Week 1: Proportions
This week I have learned the basics to portrait drawings, which is proportions. Proportions are the guide lines of the face that help to create a balanced & realistic face and keep all the parts of the face in realistic distance from each other. For example, guide lines regulate the distance between the eyes or the distance between the nose and mouth. These guide lines are very detailed, scaled down in centimeters. I have drawn (in the image shown) guide lines for the front profile and side profile. By learning these proportions, I will have a base to work on in my detailed portraits. Although I will not be experimenting with this in my genius hour project, by learning proportions you can also exaggerate proportions to create caricature (commonly used in political cartoons).
1.) Front Profile Proportions
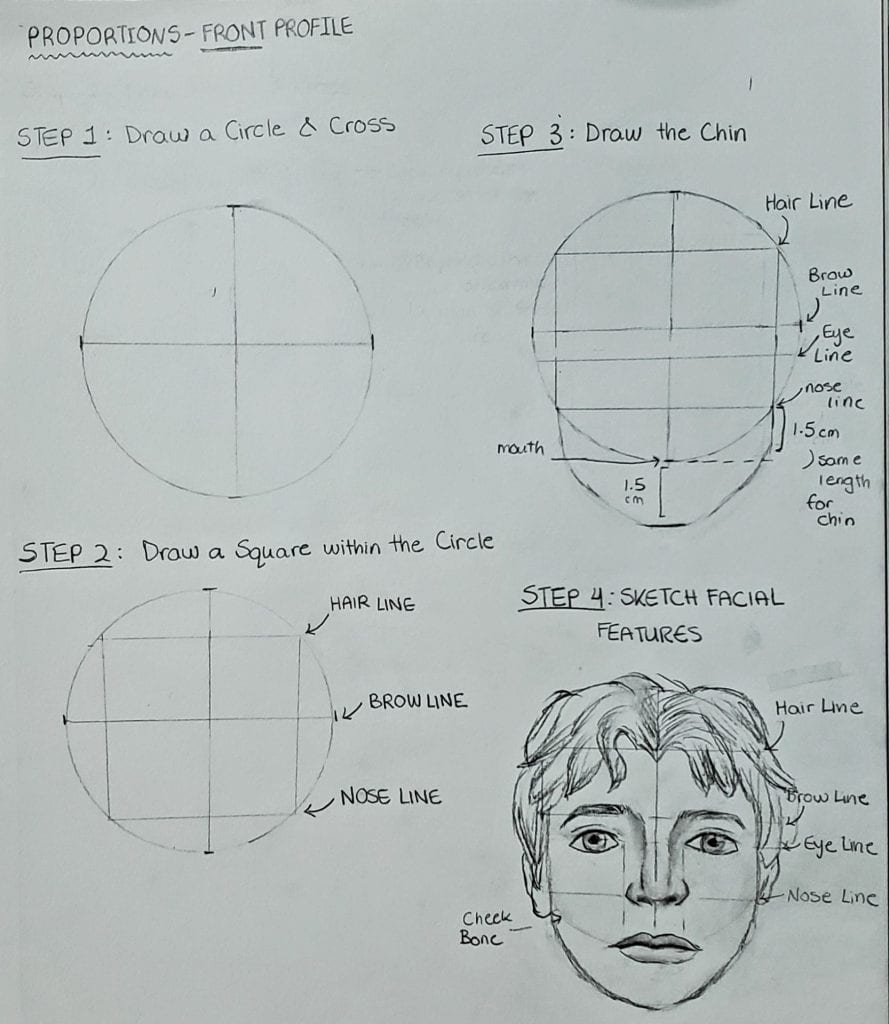
Here I have drawn the proportions for a front-profile step by step. Starting with a circle with a cross: the circle represents the top portion of the face while the cross is to determine where to place the facial features. Next, a square is drawn inside the circle. This square creates the hair line, brow line, and nose line. The length between the squares bottom horizontal line and the circle bottom edge is the length that will be added to form the chin. The chin is connected to the vertical sides of the square. This creates the basic proportion for a front-profile. For practice you may sketch in facial features to get a better understanding of face proportions.
2.) Side-Profile Proportions
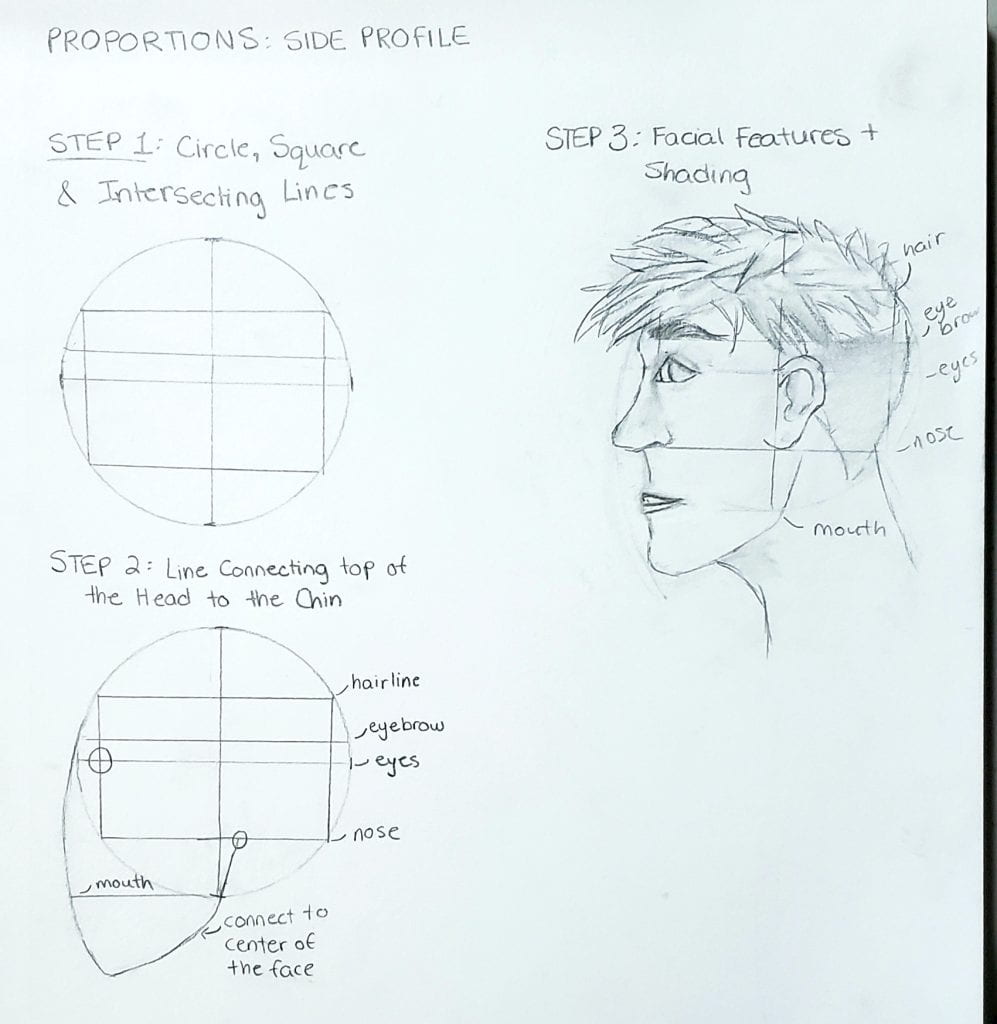
Here I have illustrated the step-by-step process for creating proportions used in a side-profile drawing. The first step is similar to front-profile proportions by using a circle with intersecting lines and a square within the circle. Again the top line of the square is the hairline, second line from the top is the brow line, and the bottom line is the nose line. The length between the middle of the square until the bottom of the square is the length to be added as the chin. Now, draw a curved line from the top of the circle down to the area marked as the chin. Bring this line to the middle of the face creating a jawline (alter the sharpness of the jawline to your preference). The ear is located on the right side of the middle line of the face between the eye and nose line. Now facial features may be sketched in to create a detailed portrait.